Indicator (distance amplifying instrument)

In various contexts of science, technology, and manufacturing (such as machining, fabricating, and additive manufacturing), an indicator is any of various instruments used to accurately measure small distances and angles, and amplify them to make them more obvious. The name comes from the concept of indicating to the user that which their naked eye cannot discern; such as the presence, or exact quantity, of some small distance (for example, a small height difference between two flat surfaces, a slight lack of concentricity between two cylinders, or other small physical deviations).
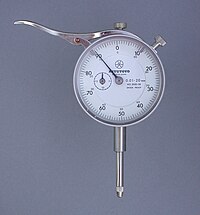
The classic mechanical version, called a dial indicator, provides a dial display similar to a clock face with clock hands; the hands point to graduations in circular scales on the dial which represent the distance of the probe tip from a zero setting. The internal works of a mechanical dial indicator are similar to the precision clockworks of a mechanical wristwatch, employing a rack and pinion gear to read the probe position, instead of a pendulum escapement to read time. The side of the indicator probe shaft is cut with teeth to provide the rack gear. When the probe moves, the rack gear drives a pinion gear to rotate, spinning the indicator "clock" hand. Springs preload the gear mechanism to minimize the backlash error in the reading. Precise quality of the gear forms and bearing freedom determines the repeatable precision of measurement achieved. Since the mechanisms are necessarily delicate, rugged framework construction is required to perform reliably in harsh applications such as machine tool metalworking operations, similar to how wristwatches are ruggedized.
Other types of indicator include mechanical devices with cantilevered pointers and electronic devices with digital displays. Electronic versions employ an optical or capacitive grating to detect microscopic steps in the position of the probe.
Indicators may be used to check the variation in tolerance during the inspection process of a machined part, measure the deflection of a beam or ring under laboratory conditions, as well as many other situations where a small measurement needs to be registered or indicated. Dial indicators typically measure ranges from 0.25 mm to 300 mm (0.015in to 12.0in), with graduations of 0.001 mm to 0.01 mm (metric) or 0.00005in to 0.001in (imperial/customary).
Various names are used for indicators of different types and purposes, including dial gauge, clock, probe indicator, pointer, test indicator, dial test indicator, drop indicator, plunger indicator, and others.
General classification
[edit]There are several variables in dial indicators:
- Analog versus digital/electronic readout (most are analog)
- Dial size. Typically referred to be American Gauge Design Specification (AGD):
AGD Diameter range (in) Diameter range (mm) 0 1-1+3⁄8 25-35 1 1+3⁄8-2 35-50 2 2-2+3⁄8 50-60 3 2+3⁄8-3 60-75 4 3-3+3⁄4 76-95
- Accuracy
- Range of travel
- Number of dial revolutions
- Dial style: balanced (e.g., −15 to 0 to +15) or continuous (e.g., 0 to 30)
- Graduation style: positive numbers (clockwise) or negative numbers (counterclockwise)
- Revolution counters, which show the number of revolutions of the principal needle.
Principles
[edit]Indicators inherently provide relative measure only. But given that suitable references are used (for example, gauge blocks), they often allow a practical equivalent of absolute measure, with periodic recalibration against the references. However, the user must know how to use them properly and understand how in some situations, their measurements will still be relative rather than absolute because of factors such as cosine error (discussed later).
Applications
[edit]- In a quality environment to check for consistency and accuracy in the manufacturing process.
- On the workshop floor to initially set up or calibrate a machine, prior to a production run.
- By toolmakers (such as moldmakers) in the process of manufacturing precision tooling.
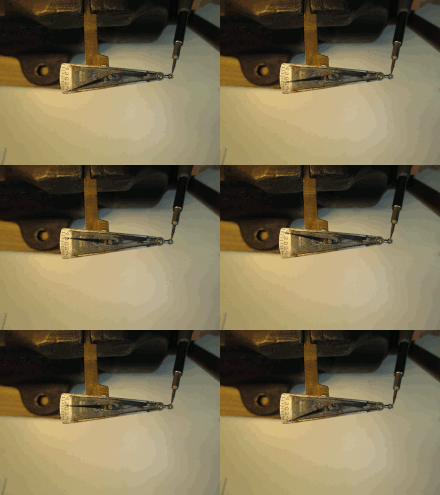
- In metal engineering workshops, where a typical application is the centering of a lathe's workpiece in a four jaw chuck. The dial indicator is used to indicate the run-out (the misalignment between the workpiece's axis of rotational symmetry and the axis of rotation of the spindle) of the workpiece, with the ultimate aim of reducing it to a suitably small range using small chuck jaw adjustments.
- In areas other than manufacturing where accurate measurements need to be recorded (e.g., physics).
- To check for lateral run-out when affixing a new rotor to an automotive disc brake. Lateral run-out (lack of perpendicularity between the disc surface and the shaft axis, caused by deformations or more frequently by a lack of proper cleaning of the mounting surface of hub. This run-out can produce brake pedal pulsations, vibration of the vehicle when brakes are applied and can induce uneven wear of the disc. The lateral run-out can be caused by uneven torque, damaged studs, or a burr or rust between the hub and rotor. This variation can be tested with a dial indicator, and most times the variation can be more or less cancelled by reinstalling the disc in other position, so that the tolerances of both the hub and the disc tend to cancel each other. To reduce the run-out, the disc is mounted and torqued to half the specified torque (as there is no wheel to distribute stresses) then a dial Indicator is placed against the braking surface and the face of the dial is centered, the disc is slowly rotated by hand and the maximum deviation is noted. If the maximum run-out is within the maximum allowed run-out specified in the manual, the disc can be installed at that position, but if the technician wants to minimize the total lateral run-out, other around the clock positions can be tried. Excessive run-out can rapidly ruin the disc if it exceeds the specified tolerance (typically up to 0.004 inches (0.10 mm) but most discs can attain less than 0.002 inches (0.05 mm) or less if installed at the optimum position).
Probe indicator
[edit]
Probe indicators typically consist of a graduated dial and needle driven by a clockwork (thus the clock terminology) to record the minor increments, with a smaller embedded clock face and needle to record the number of needle rotations on the main dial. The dial has fine gradations for precise measurement. The spring-loaded probe (or plunger) moves perpendicularly to the object being tested by either retracting or extending from the indicator's body.
The dial face can be rotated to any position, this is used to orient the face towards the user as well as set the zero point, there will also be some means of incorporating limit indicators (the two metallic tabs visible in the right image, at 90 and 10 respectively), these limit tabs may be rotated around the dial face to any required position. There may also be a lever arm available that will allow the indicator's probe to be retracted easily.
Mounting the indicator may be done several ways. Many indicators have a mounting lug with a hole for a bolt as part of the back plate. Alternatively, the device can be held by the cylindrical stem that guides the plunger using a collet or special clamp, which is the method generally used by tools designed to integrate an indicator as a primary component, such as thickness gauges and comparators. Common outside diameters for the stem are 3/8 inch and 8 mm, though there are other diameters made. Another option that a few manufacturers include is dovetail mounts compatible with those on dial test indicators.
Dial test indicator
[edit]
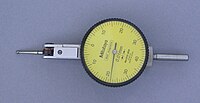
A dial test indicator, also known as a lever arm test indicator or finger indicator, has a smaller measuring range than a standard dial indicator. A test indicator measures the deflection of the arm, the probe does not retract but swings in an arc around its hinge point. The lever may be interchanged for length or ball diameter, and permits measurements to be taken in narrow grooves and small bores where the body of a probe type may not reach. The model shown is bidirectional, some types may have to be switched via a side lever to be able to measure in the opposite direction.
These indicators actually measure angular displacement and not linear displacement; linear distance is correlated to the angular displacement based on the correlating variables. If the cause of movement is perpendicular to the finger, the linear displacement error is acceptably small within the display range of the dial. However, this error starts to become noticeable when this cause is as much as 10° off the ideal 90°.[1] This is called cosine error, because the indicator is only registering the cosine of the movement, whereas the user likely is interested in the net movement vector. Cosine error is discussed in more detail below.
Contact points of test indicators most often come with a standard spherical tip of 1, 2, or 3 mm diameter. Many are of steel (alloy tool steel or HSS); higher-end models are of carbides (such as tungsten carbide) for greater wear resistance. Other materials are available for contact points depending on application, such as ruby (high wear resistance) or Teflon or PVC (to avoid scratching the workpiece). These are more expensive and are not always available as OEM options, but they are extremely useful in applications that demand them.
Modern dial test indicators are usually mounted using either an integrated stem (on the right of the image) or by a special clamp that grabs a dovetail on the indicator body. Some instruments may use special holders.
Test indicator
[edit]
Prior to modern geared dial mechanisms, test indicators using a single lever or systems of levers were common. The range and precision of these devices were generally inferior to modern dial type units, with a range of 10/1000 inch to 30/1000 inch, and precision of 1/1000 inch being typical. One common single lever test indicator was the Starrett (No. 64), and those using systems of levers for amplification were made by companies such as Starrett (No. 564)[2] and Lufkin (No. 199A),[3] as well as smaller companies like Ideal Tool Co. Devices that could be used as either a lever test indicator or a plunger type were also manufactured by Koch.[4]
Digital indicator
[edit]With the advent of electronics, the clock face (dial) has been replaced in some indicators with digital displays (usually LCDs) and the clockwork has been replaced by linear encoders. Digital indicators have some advantages over their analog predecessors. Many models of digital indicator can record and transmit the data electronically to a computer, through an interface such as RS-232 or USB. This facilitates statistical process control (SPC), because a computer can record the measurement results in a tabular dataset (such as a database table or spreadsheet) and interpret them (by performing statistical analysis on them). This obviates manual recording of long columns of numbers, which not only reduces the risk of the operator introducing errors (such as digit transpositions) but also greatly improves the productivity of the process by freeing the human from time-consuming data recording and copying tasks. Another advantage is that they can be switched between metric and inch units with the press of a button, thus obviating a separate unit conversion step of entering into a calculator or web browser and then recording the results.
Contact point (tip) types
[edit]Plunger (drop) indicator tips
[edit]On drop indicators, the tip of the probe usually may be interchanged with a range of shapes and sizes depending on the application. The tips typically are attached with either a #4-48 or an M2.5 screw thread. Spherical tips are often used to give point contact. Cylindrical and flat tips are also used as the need arises. Needle-shaped tips allow the tip to enter a small hole or slot. Accessory sets of tips are sold separately and inexpensively, so that even indicators that have no set of tips may be augmented with a new set.
Dial test indicator tips
[edit]Dial test indicators, whose tips swing in an arc rather than plunging linearly, usually have spherical tips. This shape gives point contact, allowing for consistent measurements as the tip moves through its arc (via consistent offset distance from ball surface to center point, regardless of ball contact angle with the measured surface). Several spherical diameters are commercially offered; 1mm, 2mm, and 3mm are the standard sizes.
Despite the advantage just mentioned (regarding contact angle irrelevance) of the ball (sphere) itself, the contact angle of the lever overall does matter. On most DTIs it must be parallel (0°, 180°) to the surface being measured in order for the measurement to be truly accurate, that is, for the magnitude of the dial reading to reflect the true tip movement distance without cosine error. In other words, the path of the tip's movement must coincide with the vector that is being measured; otherwise, only the cosine of the vector is being measured (yielding the error called cosine error). In such cases the indicator may still be useful, but an offset (multiplier or correction factor) must be applied to achieve a correct measurement (where the measurement is absolute rather than merely comparative). (This fact applies to the angle between the lever and the part, not to the angle between the lever and the DTI body,[5] which is adjustable on most DTIs.) The same principle is also employed with CMM touch trigger probes (TTPs), where the machine (when used correctly) adjusts its ball-offset compensation to account for any difference between the approach vector and the surface vector.
Some DTIs (such as the Interapid line and its competitors) are made with a built-in allowance such that a 12° tip angle (between the lever and the surface being measured) is the angle that corresponds to zero cosine error. This is a great convenience to the user because of the practicality of having the ball being clear of the indicator body such that the unit may pass over a surface.
Changing the tip of a DTI is not as simple an affair as changing the tip of a drop indicator, because the tip, being a lever, has its length precisely matched to the clockwork inside the indicator, so that the length of the arc of its extremity's movement has a known ratio to the gears that drive the dial's needle. Thus to add a longer or shorter tip requires a correction factor to be multiplied with the dial reading in order to yield a true distance reading. DTI tips are often threaded for interchange (like drop indicator tips), with small flats to accept a spanner; but the intent regarding user-serviceable tip change is limited only to the tips that originally came with the indicator, because of the above-mentioned importance of the length. Typically a DTI comes with only a few tips, such as a small-ball tip and a large-ball tip.
Neither of the above considerations (cosine error or lever length error) matters if the dial reading is being used only comparatively (rather than absolutely). But the avoidance of mistakes of the comparative-versus-absolute-confounding type rests with the knowledge and attention of the user, rather than with the instrument itself, and thus repairers of DTIs usually will not certify the accuracy of a DTI that cannot offer an accurate absolute measurement—even if it is perfectly good for comparative use alone. Such a DTI could still be certified (and labeled) for comparative use only, but because risk of user error is involved, gauge calibration rules in machine shops either demand a "comparative use only" label (if the users can be trusted to understand and follow it) or demand that the indicator be removed from service (if not).
See also
[edit]- Indicator diagram, a pressure-volume diagram measured on a piston engine
- Metrology – Science of measurement and its application
References
[edit]- ^ "Understanding Errors in Hand-Held Measuring Instruments".
- ^ Sisson 1934
- ^ Witchger 1941
- ^ Koch 1906
- ^ Pieczynski, Joe (2018-01-17), Cosine Error Demonstrated and Challenged, archived from the original on 2021-12-13. (Machinist training video.)
{{citation}}: CS1 maint: postscript (link)
Further reading
[edit]- Starrett Catalog No. 31B. Athol, MA: The L. S. Starrett Company. 2007.
- "Mahr Inc. Gaging Tips". Providence, RI: Mahr Inc.
External links
[edit]- Practical metal and woodworking applications
- Simulator - dial indicator in millimeter with graduation of 0.01mm
